
0 to 450 Smoked Spatchcock Chicken on a Pellet Grill
0 to 450 Smoked Spatchcock Chicken on a Pellet Grill
If you’ve ever pulled a smoked chicken off the pellet grill and ended up with rubbery skin, you already know the frustration. You want that good smoke flavor, but you also want skin that bites through clean and meat that stays juicy from edge to edge.
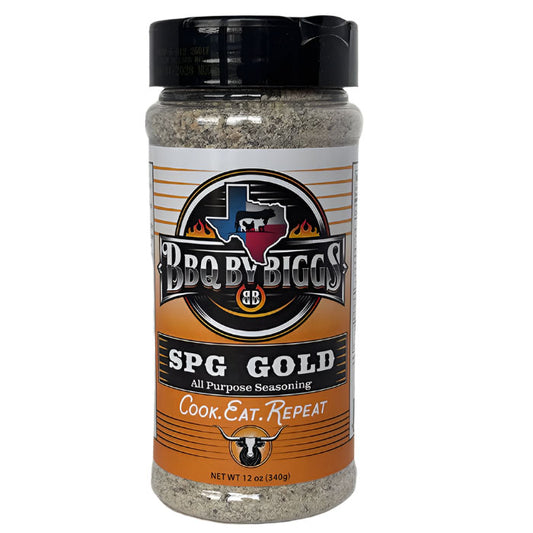
That’s exactly why this 0 to 450 method has become one of my favorite ways to cook a whole chicken. For this cook, I took a whole bird, spatchcocked it, seasoned it with BBQ by Biggs SPG Gold, and cooked it on my Yoder YS-640. The goal was simple: build smoke flavor early, then finish hot enough to help that skin render and crisp up.

And let me tell you — this one delivered. The chicken came out juicy, smoky, and packed with flavor, but the real win was that skin. No rubbery bite. No leathery chew. Just a clean, tender bite-through finish that makes you want to go right back for another piece.
Why the 0 to 450 Method Works
The “zero” in this method simply means the chicken goes on while the smoker is still off. From there, the pit gets started and brought up to 350°F. That startup phase gives the bird time to sit in that smoky chamber while the cooker comes to temperature, which helps build color and flavor right from the start.
Once the chicken gets into the right internal range, the heat gets bumped to 450°F to finish the cook. That hotter finish is what helps render the fat under the skin and move you closer to that crispy, bite-through texture everybody wants on smoked chicken.

I like this approach because it gives you the best of both worlds. You get more smoke exposure on the front end, but you still get that hot finish at the end that helps the outside tighten up instead of staying soft and chewy.
How I Prepped the Chicken
For this cook, I started with a whole chicken a little over 6 1/2 pounds. After removing it from the package and taking out the innards, I flipped it over and cut along both sides of the backbone to spatchcock it. You can do that with a knife, but a good pair of kitchen shears makes the job a whole lot easier.

Once the backbone was removed, I opened the bird up and pressed it flat. That step matters because it helps the chicken cook more evenly, especially when you’re trying to get both the breast and dark meat to finish in a good range without drying out the white meat.

Before seasoning, I patted the chicken dry really well and trimmed up any loose fat or anything that didn’t need to stay on the bird. A sharp 6-inch boning knife is handy for that kind of cleanup work. The drier the skin is at the beginning, the better your chances are of getting a cleaner finish by the end.
Seasoning It Up
After drying the chicken off, I added a light coat of olive oil all over both sides. Then I seasoned it generously with BBQ by Biggs SPG Gold, making sure to get under the wings and around the legs too.

SPG Gold works really well here because it keeps the flavor simple and savory without loading the outside up with too much sugar. Since this method finishes hot, that matters. If you go heavy with a sugary rub, there’s always a bigger risk of the outside getting too dark before the inside is where you want it.
Getting the Bird on the Smoker
To make handling easier, I set the chicken on a smoking/cooling rack before moving it to the pit. If you cook spatchcock chicken often, this is one of those simple tools that just makes life easier. It helps keep the bird together and makes it easier to move on and off the smoker without fighting it.

I cooked this one on the top shelf of my Yoder YS-640 pellet smoker, where I get good convection for a cook like this. The chicken went on while the smoker was still off, and then I started the pit and let it run up to 350°F.
The 350 Degree Check-In
As the smoker came up to temperature, the chicken had time to soak up smoke and start building color. On this cook, it took about 55 minutes for the pit to reach 350°F. At that point, the bird already had some really nice color developing, especially considering the only seasoning on it was SPG Gold.

When I checked the internal temperature, the breast was around 108 to 110°F and the thigh was running a little hotter, right where it should be. Since I wanted the breast to get into that 125 to 130°F range before jumping to 450°F, I held it at 350°F for a little longer.
This is where a fast, accurate thermometer really matters. A good tool like the Thermapen ONE makes it easy to check the breast and thigh quickly so you can make the right call based on the bird in front of you — not just the clock.
Finishing at 450 for Better Skin
For this bird, I ended up holding at 350°F for about 18 minutes until the breast reached 130°F. Once it got there, I bumped the smoker to 450°F and let the hotter finish do its job.
That last stretch is what helps take the skin where it needs to go. By that point, the fat under the skin is already starting to render, and that hotter finish helps tighten everything up and improve the overall bite.
After the cooker reached 450°F, the chicken stayed there for about 8 to 10 minutes. The breast finished around 162°F, and the bird was ready to come off. I tented it loosely with foil instead of wrapping it tight so it could rest without steaming the skin.
The Final Result
The whole cook came in at just under 2 hours on this 6 1/2-pound bird, and the final result was exactly what I was after. The breast meat was juicy, the chicken had great smoke color, and the skin bit through clean instead of pulling like rubber.

This is one of those cooks that looks impressive, feeds the family well, and doesn’t require a bunch of complicated ingredients. Just a good bird, a simple seasoning, and paying attention to temperature all the way through.
If you’re looking for a great all-purpose seasoning for cooks like this, check out BBQ by Biggs SPG Gold. It’s a great fit for chicken, pork, seafood, vegetables, and a whole lot more.
Download the Printable Recipe PDF
Watch the Full Video
If you’d rather watch the whole process from prep to taste test, you can check out the full video below:
Final Thoughts
If you’ve been fighting rubbery skin on smoked chicken, this method is absolutely worth trying. Starting the bird on a cold smoker gives you that early smoke exposure, pausing at 350°F gives you a chance to adjust, and finishing at 450°F helps the skin land where it should.
It’s simple, repeatable, and a great way to cook a whole chicken when you want something that tastes every bit as good as it looks.
Catch more recipes, cooks, and behind-the-scenes content on YouTube, Facebook, and Instagram. We’d love to have you as part of the Biggs Crew.
Thanks for reading, Biggs Crew! Until next time — keep the fire lit and the smoke rollin’.
Check out Texas Rod & Reel — our sister site where we dive into fishing tips, gear reviews, and fresh-from-the-water recipes that pair perfectly with a slab of Texas sheet cake.
Two passions. One lifestyle.
From cast iron to casting lines — we’ve got you covered.
Some of the links on this site are affiliate links. This means that if you click on the link and make a purchase, we may earn a small commission — at no additional cost to you. These commissions help support the content we create and keep this site running. We only recommend products and services that we personally use, trust, or believe will bring value to you. Thank you for supporting BBQ by Biggs and helping us share more great BBQ recipes, rubs, and gear!
Questions From the Biggs Crew
What does 0 to 450 mean for smoked chicken?
The 0 to 450 method means the chicken goes onto the smoker while the pit is still off. The smoker is then started and brought up to 350°F, where you check the bird and hold if needed, before finishing at 450°F to help crisp the skin.
Why spatchcock a chicken before smoking?
Spatchcocking helps the chicken cook more evenly by flattening the bird. That makes it easier to get juicy breast meat, properly cooked dark meat, and better skin texture across the whole chicken.
How do you get crispy skin on smoked chicken?
Crispy skin starts with drying the chicken well, using a seasoning that is not too heavy in sugar, and finishing the cook at a higher temperature. In this method, the final 450°F stage helps render the fat under the skin for a better bite.
Can you make this chicken in the oven?
Yes, you can make a version of this recipe in the oven. You will not get the same smoke flavor, but you can still spatchcock the chicken, season it the same way, roast it at 350°F until the breast reaches about 125 to 130°F, then raise the oven to 450°F to help crisp the skin and finish cooking.
What internal temperature should smoked chicken be?
For this cook, the breast was pulled at about 162°F, while the dark meat was in the 175 to 180°F range. Always verify doneness with a reliable thermometer before serving.